 Save to Pins
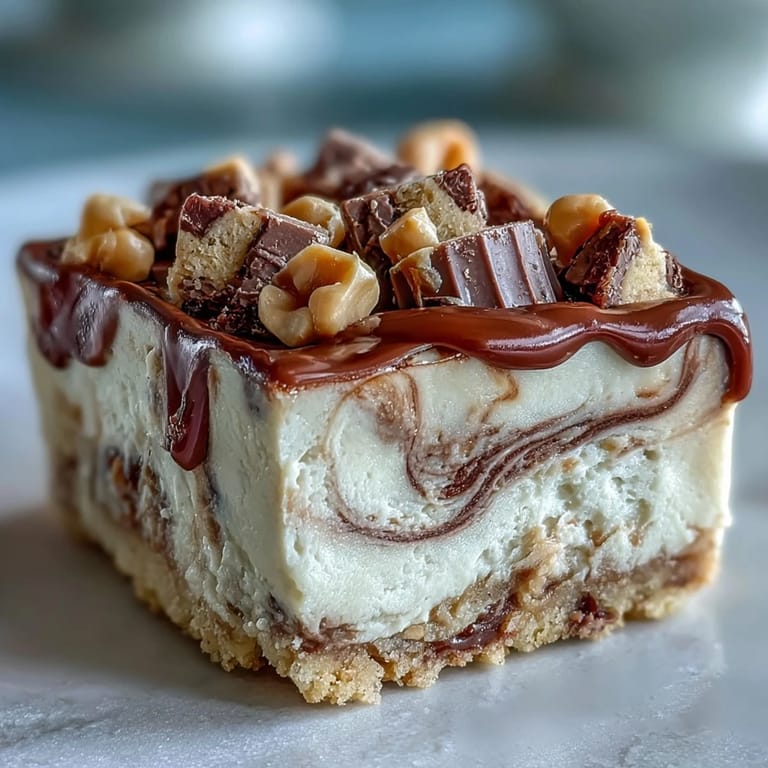
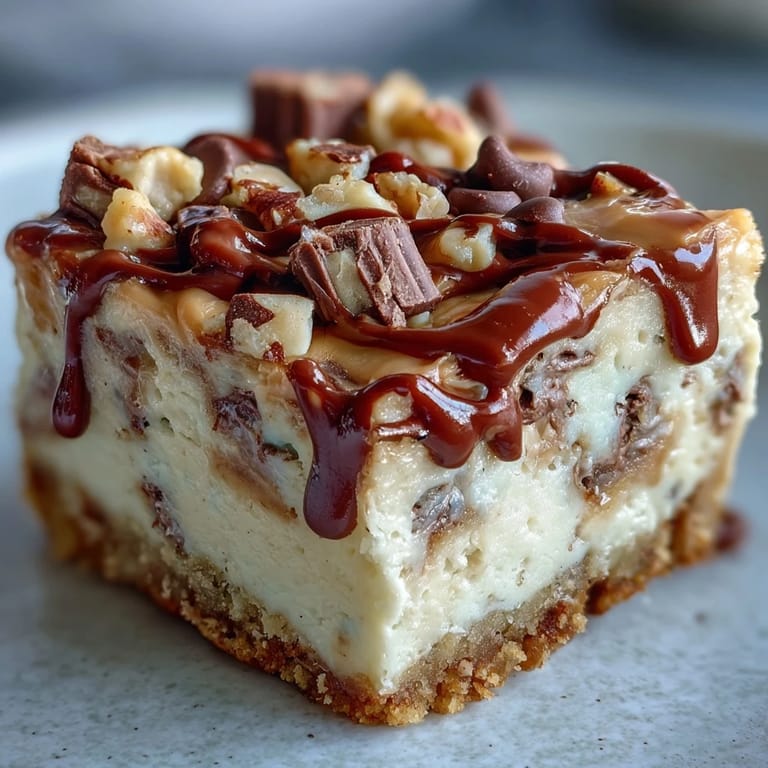
 My kitchen smelled like a candy factory the afternoon I first combined two of my greatest weaknesses into one dessert. A friend had left a half-eaten box of peanut butter cups on my counter, and I was staring at cream cheese that needed using, when it hit me: why choose between cheesecake and chocolate when you could have both swirled together? What started as kitchen experimentation became the dessert I've made more times than I can count, each batch disappearing faster than the last.
I brought these to a potluck once thinking they'd be nice enough, but watching people's faces when they bit into that first bar made me feel like I'd discovered gold. Someone actually asked me to make them for their birthday, which was the moment I knew this recipe had staying power. Now whenever I need to bring something to a gathering, these bars are my secret weapon.
Ingredients
- Chocolate cookie crumbs (1 1/2 cups): Use actual chocolate sandwich cookies and pulse them in a food processor for even texture, then pinch off and discard the creamy filling since it won't bind properly.
- Unsalted butter, melted (1/4 cup): This is your binding agent, so don't skimp or substitute with oil—the crust needs that richness to hold together.
- Granulated sugar for crust (2 tbsp): Just a touch of sweetness to balance the bitter chocolate cookies.
- Cream cheese, softened (16 oz): Leave it out for a full hour before you start, otherwise you'll have lumps no matter how much you beat it.
- Granulated sugar for filling (2/3 cup): This sweetens the entire cheesecake, so don't reduce it thinking it will still taste good.
- Large eggs, room temperature (2): Temperature matters here because cold eggs won't blend smoothly into the batter.
- Sour cream (1/2 cup): This adds tang and moisture without making the bars too dense.
- Creamy peanut butter (1/2 cup): The star ingredient—use real peanut butter, not the natural kind that's all oil on top.
- Vanilla extract (1 tsp): A whisper of vanilla that somehow makes everything taste more like itself.
- Mini peanut butter cups, chopped (1 1/2 cups): These add pockets of pure joy throughout, so don't skip them or use regular-sized cups that won't distribute evenly.
- Semisweet chocolate chips (1/2 cup): Optional but recommended—they catch the light and make your bars look like they belong in a bakery.
- Creamy peanut butter, melted (2 tbsp): For drizzling on top, this adds a professional finishing touch.
Tired of Takeout? 🥡
Get 10 meals you can make faster than delivery arrives. Seriously.
One email. No spam. Unsubscribe anytime.
Instructions
- Prep your pan and oven:
- Heat your oven to 350°F and line a 9x9-inch pan with parchment paper, leaving extra hanging over the edges so you can pull the whole thing out later. This little hack changed my life because trying to cut bars out of a pan is a mess.
- Build the crust:
- Mix crushed chocolate cookies with melted butter and sugar until it looks like wet sand, then press it firmly into the bottom of your pan and give it an 8-minute head start in the oven. You want it set but not hard, just enough structure to hold the filling without crumbling when you pour.
- Blend the magic:
- Beat your softened cream cheese and sugar until it's completely smooth and fluffy, scraping the sides as you go because there are always hidden lumps. Add eggs one at a time, then fold in sour cream, peanut butter, and vanilla until everything is uniform.
- Fold in the treasure:
- Gently mix in 1 cup of chopped peanut butter cups, being careful not to break them into tiny pieces. Save the remaining half cup for sprinkling on top where they'll stay visible and wonderful.
- Layer and bake:
- Pour the filling over your cooled crust, spread it smooth, then scatter the remaining peanut butter cups across the top. Bake for 25 to 28 minutes—the center should jiggle just slightly when you gently shake the pan, not completely solid.
- Cool with patience:
- Let these sit at room temperature until they stop steaming, then move them to the fridge for at least 2 hours, or overnight if you can wait. Cold cheesecake is always better than warm cheesecake, I promise.
- Finish with flair:
- Before serving, drizzle melted peanut butter across the top and add chocolate chips if you want them to look absolutely stunning. Use a sharp knife dipped in hot water between each cut for clean edges.
 Save to Pins
 There's something about watching someone's eyes light up when they taste cheesecake that makes you feel like you've done something right. These bars have a way of turning an ordinary afternoon into something celebratory, which is exactly what good desserts should do.
The Secret Behind the Texture
The reason these bars have that perfect balance between creamy and substantial is because of how the peanut butter cups get distributed throughout. When you fold some into the batter and scatter others on top, you're creating surprise pockets of chocolate and peanut flavor in every bite. The sour cream also plays a huge role—it keeps the cheesecake from becoming dense and heavy, adding just enough tang to cut through the richness.
Making Them Your Own
The beauty of this recipe is how flexible it is once you understand the basic structure. I've added chopped roasted peanuts to the crust for extra crunch, swapped in almond butter when someone asked, and even drizzled dark chocolate on top instead of the peanut butter drizzle. The framework stays the same, but the details are yours to play with.
Serving and Storage Tips
These bars taste best straight from the fridge, served with something cold—milk is traditional, but I've found that a light-bodied coffee actually complements the peanut and chocolate better. They keep beautifully in an airtight container in the refrigerator for up to five days, which means you can make them a day or two ahead of time.
- Cut bars with a hot, wet knife wiped clean between each slice for that bakery-quality presentation.
- If you're transporting them somewhere, keep them in the fridge until the last possible moment before serving.
- These freeze well for up to three months if you want to make a batch and save some for later.
 Save to Pins
 Making these bars is one of those kitchen projects that teaches you something every time, whether it's about patience, timing, or just how powerful a combination of peanut butter and chocolate really is. I hope you make them soon and find yourself making them again and again.
Questions & Answers
- → Can I use almond butter instead of peanut butter?
Yes, almond butter can be substituted to accommodate allergies or flavor preferences, though it will slightly alter the taste and texture.
- → How do I achieve a firmer crust?
Adding finely chopped roasted peanuts to the cookie crumb crust mix enhances crunch and firmness.
- → What is the best way to ensure even baking?
Bake until the center is just set but still slightly jiggly. Cooling completely and refrigerating helps the bars firm up properly.
- → Can I prepare these bars ahead of time?
Yes, refrigerate the bars for up to five days in an airtight container to maintain freshness and texture.
- → What pairs well with these bars?
They complement cold milk or a light-bodied coffee, enhancing the creamy and nutty flavors.
- → Are the chocolate chips essential?
Chocolate chips are optional for garnish and add extra richness, but the bars are delicious without them.