 Save to Pins
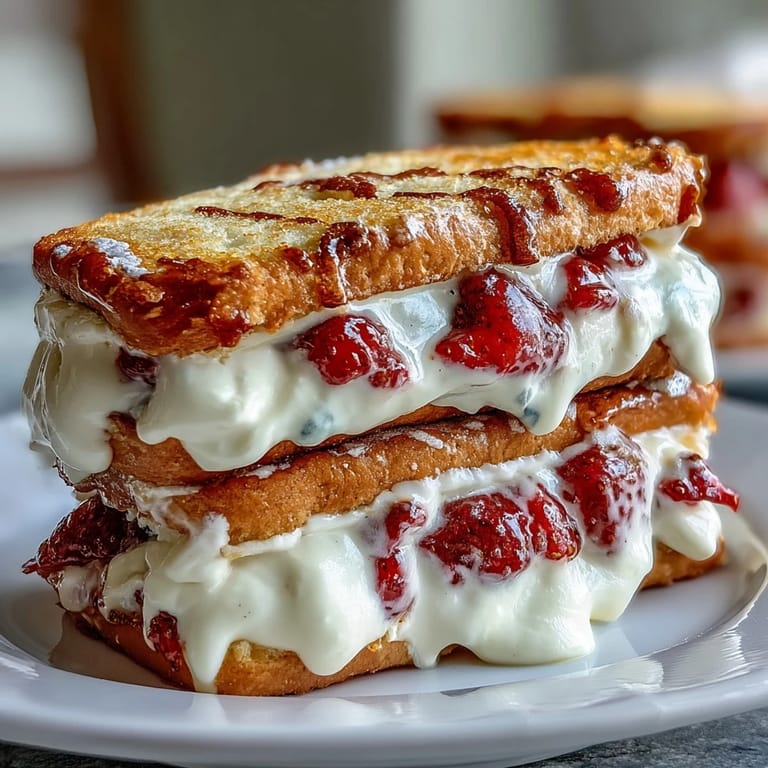
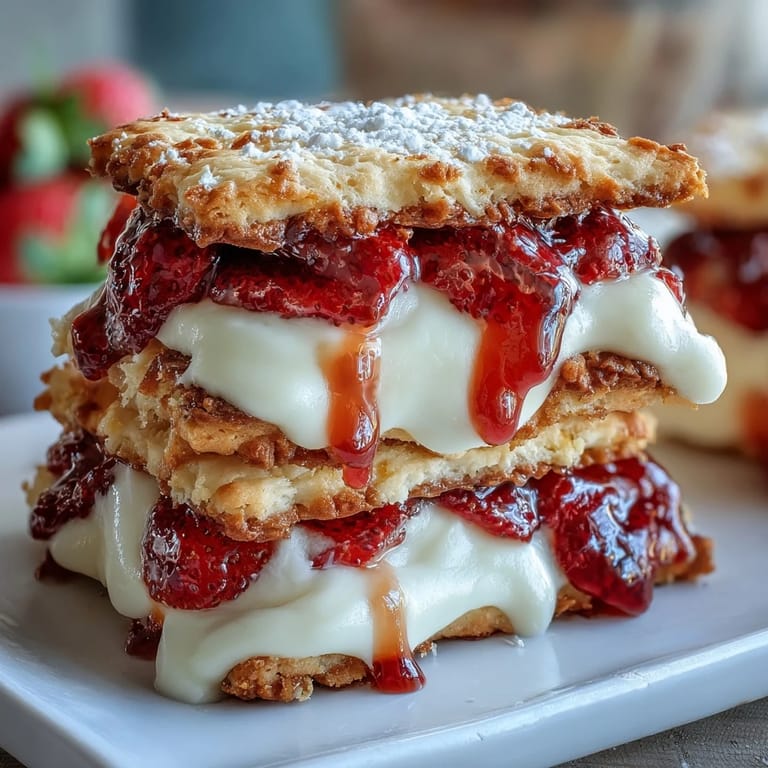
 Last summer, my neighbor brought over a box of strawberry shortcake cookies from a local bakery, and I bit into one expecting the usual crumbly mess—instead, the tender cookie practically melted, releasing this perfect burst of fresh strawberry and vanilla cream. I spent that entire afternoon in my kitchen trying to reverse-engineer them, armed with nothing but determination and a fridge full of strawberries from the farmer's market. What started as an afternoon experiment became the dessert I now make whenever I want to feel like I'm biting into something special without all the fuss of assembling a traditional shortcake. These cookies somehow taste like summer nostalgia and homemade comfort at the exact same time.
I made these for my daughter's book club last May, and watching everyone bite into one and actually pause mid-conversation was the kind of kitchen victory that sticks with you. One friend asked if I'd bought them from somewhere fancy, and I remember feeling that quiet glow of pride when I said I'd made them that morning. Those cookies became the conversation starter that evening, which somehow felt more meaningful than if they'd just been delicious and forgettable.
Ingredients
- All-purpose flour (2 cups): The foundation for tender, delicate cookies that won't spread into thin discs—don't sift unless your flour has been sitting in a humid pantry.
- Baking powder and baking soda (1 tsp and 1/2 tsp): This combination gives the cookies their characteristic lift and slight tang that plays beautifully with the strawberries.
- Salt (1/4 tsp): A small pinch that makes the sweetness feel rounder and more intentional.
- Unsalted butter (1 2 cups total): Use the softened kind—cold butter won't cream properly with the sugar, and your cookies will be dense instead of tender.
- Granulated sugar (2/3 cup): The amount here creates cookies that are sweet but not cloyingly so, letting the strawberry flavor actually speak.
- Egg (1 large): This binds everything while adding richness that makes the cookies feel almost luxurious.
- Vanilla extract (1 tsp for dough, 1 tsp for filling): Use real vanilla—the difference between extract and imitation matters when vanilla is supposed to be the supporting actor to the strawberry.
- Sour cream (1/3 cup): This is the secret—it adds moisture and a subtle tang that prevents the cookies from tasting flat.
- Fresh strawberries (1 cup, finely diced): Pat them completely dry with paper towels, or the moisture will migrate through the dough during baking and create a sogginess that defeats the entire purpose.
- Powdered sugar (1 1/2 cups for filling): Sift it before using, especially if it's been stored with humidity—lumps in your cream filling are disappointing.
- Heavy cream (2 tbsp for filling): This lightens the cream filling to the right consistency and prevents it from being tooth-achingly thick.
Tired of Takeout? 🥡
Get 10 meals you can make faster than delivery arrives. Seriously.
One email. No spam. Unsubscribe anytime.
Instructions
- Heat your oven and prep your workspace:
- Set the oven to 350°F and line two baking sheets with parchment paper—this prevents sticking and means you can slide your cookies off easily once they're done. Cold baking sheets are your friend here, so don't reuse one immediately after the first batch finishes.
- Combine your dry ingredients:
- In a medium bowl, whisk together the flour, baking powder, baking soda, and salt until everything is evenly distributed. This prevents the baking soda from creating little bitter pockets in your cookies.
- Cream the butter and sugar:
- In a large bowl, beat the softened butter and sugar together for about 2 to 3 minutes until the mixture looks pale and fluffy—this is where the cookies get their tender crumb. You're incorporating tiny air pockets that will expand in the oven.
- Add the egg and vanilla:
- Drop the egg in and beat until completely combined, then add the vanilla extract and mix again. This step feels simple, but rushing it means you'll have pockets of egg white visible in your dough, which bakes unevenly.
- Incorporate the sour cream:
- Mix in the sour cream until smooth—don't overmix, because you want the dough to stay tender. The sour cream should disappear into the mixture, looking completely integrated.
- Gently combine wet and dry ingredients:
- Add the dry ingredients to the wet mixture and mix on low speed just until you don't see any flour streaks anymore. This is the moment to stop—overmixing activates gluten and makes cookies tough, not tender.
- Fold in the strawberries:
- Use a spatula or wooden spoon to gently fold the diced, patted-dry strawberries into the dough at the very last second. You want them distributed throughout without crushing them into juice.
- Portion the dough onto baking sheets:
- Drop heaping tablespoons of dough onto your prepared sheets, spacing them about 2 inches apart—these cookies don't spread dramatically, but they need room to bake evenly. If you have a cookie scoop, it makes this step foolproof.
- Bake until edges turn golden:
- Bake for 13 to 15 minutes, watching for the moment when the edges start to turn a light golden brown but the centers still look slightly underdone. Remove them at this point—carryover heat will finish them, and underbaked cookies cool into tender treasures while overbaked ones turn hard.
- Cool with intention:
- Let the cookies sit on the baking sheet for 5 minutes so they set enough to handle without falling apart, then transfer them to a wire rack to cool completely. Assembling cookies that are still warm creates a melty mess.
- Make the cream filling:
- Beat the softened butter until it's creamy and pale, then gradually add the sifted powdered sugar a bit at a time, beating after each addition. Once combined, add the vanilla and heavy cream and beat until the filling is light and fluffy—this takes about 2 minutes and transforms the texture from dense to cloud-like.
- Assemble your sandwich cookies:
- Once the cookies are completely cool, spread or pipe a generous amount of cream filling onto the flat side of half the cookies, then gently press the remaining cookies on top to create sandwiches. If the filling seems too soft, refrigerate it for 10 minutes before assembly.
 Save to Pins
 There's something magical about the moment when someone realizes these are cookies and not tiny cakes—the surprise, the slight resistance of the tender crumb, and then that burst of strawberry and cream. That's when you know you've made something worth making again.
The Strawberry Question
Strawberries are finicky when it comes to baking—they hold water and release it at the most inconvenient moments, so choosing berries that are ripe but still relatively firm makes a real difference. I've learned that local berries from the market taste infinitely better than shipped ones, and if they're a little soft, blot them extra carefully with paper towels or they'll weep into the dough. Buying them the same day you're baking ensures they're as fresh as possible, which translates to actual strawberry flavor in your finished cookies instead of a vague fruitiness.
Storage and Shelf Life
These cookies love living in an airtight container in the refrigerator for up to three days, where the cream filling stays stable and the cookies maintain their tender texture. At room temperature, the cream filling softens quickly and the cookies start to taste slightly stale after a day, so refrigeration is worth it if you're making them ahead. If you want to store just the unfilled cookies, keep them in an airtight container at room temperature for up to two days, then assemble them fresh with newly made cream filling.
Flavor Variations and Pairings
These cookies exist in that perfect intersection of elegant and approachable, so they pair beautifully with afternoon tea, summer picnics, or as an unexpected finish to a dinner party that would normally end with store-bought dessert. The vanilla and strawberry combination feels timeless, but I've played with adding a whisper of lemon zest to the dough or a tiny hint of almond extract to the filling, and both work if you're feeling adventurous. Cold milk, sparkling lemonade, rosé, or even strong black tea all complement these cookies in their own way, so serve them alongside whatever beverage makes you happy.
- A hint of lemon zest added to the cookie dough brightens the strawberry flavor without making it taste citrusy.
- Whipped cream mixed into the filling instead of heavy cream creates an even lighter texture that tastes almost like buttercream.
- These cookies are vegetarian as written but not vegan—if you need to adapt them, experiment slowly because egg and dairy both play important structural roles.
 Save to Pins
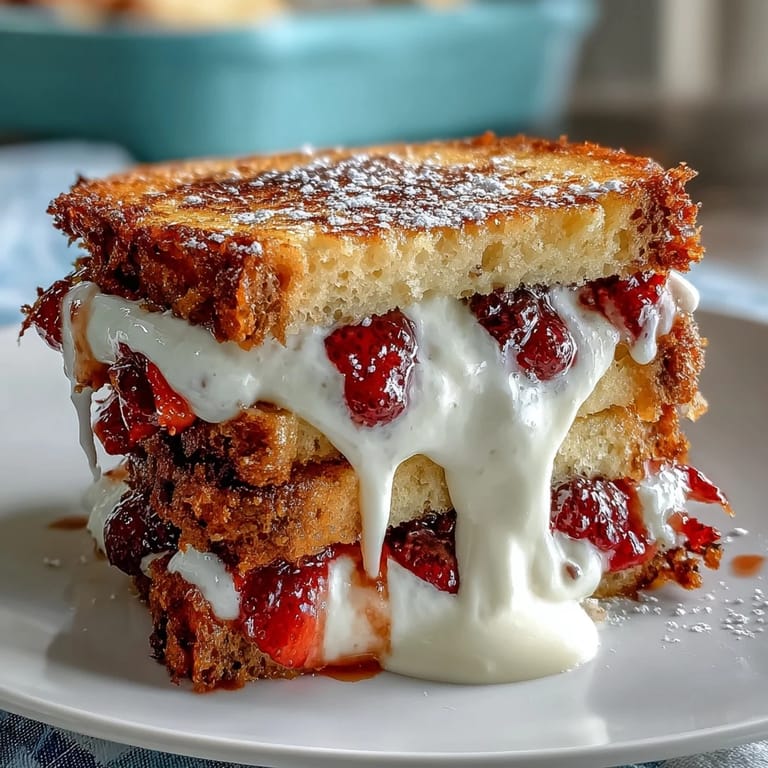
 These strawberry shortcake cookies remind me that some of the best desserts aren't complicated—they're just carefully made with attention to small details that add up to something memorable. Bake them when you want to feel like you've done something special, because you have.
Questions & Answers
- → How do I ensure the strawberries don't make the cookies soggy?
Make sure to finely dice the strawberries and pat them dry thoroughly before folding into the dough. This helps maintain the cookies' texture and prevents sogginess.
- → Can I substitute any ingredients for dietary restrictions?
Yes, you can replace butter with plant-based alternatives and use egg substitutes if needed. Adjust accordingly and check labels for allergens.
- → What is the best way to store these cookies?
Store finished sandwich cookies in an airtight container in the refrigerator. They stay fresh for up to three days.
- → Can I add any flavor variations to the cookie dough?
Adding a hint of lemon zest to the dough complements the strawberries beautifully and adds a fresh citrus note.
- → What tools are essential for making these cookies?
Basic kitchen tools include mixing bowls, an electric mixer, measuring cups and spoons, baking sheets lined with parchment paper, a wire rack, and a spatula.