 Save to Pins
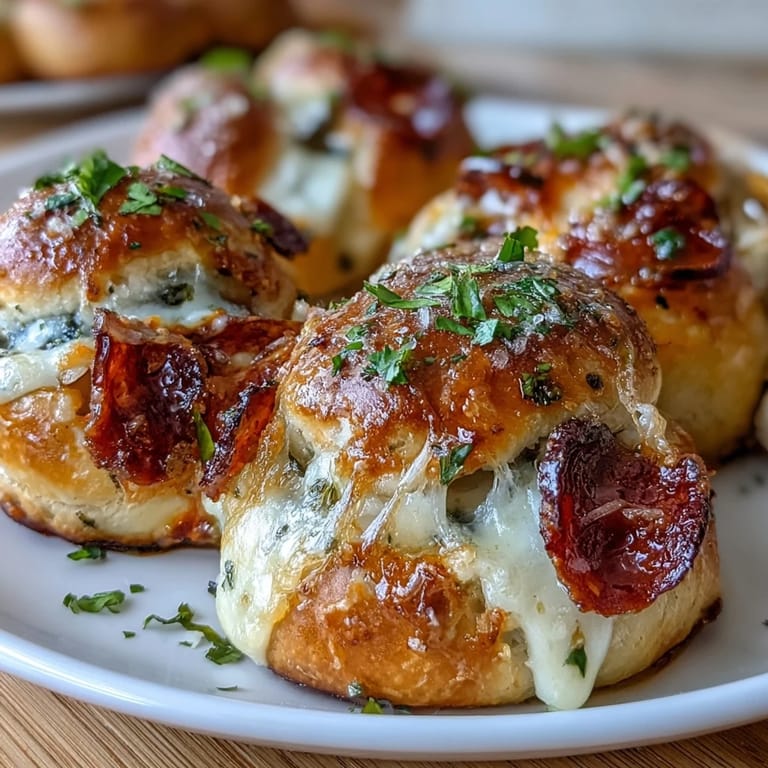
 My kitchen smelled like a pizzeria the afternoon I first twisted these together, except it wasn't from a traditional oven—it was from my little countertop setup and the curious combination of Greek yogurt dough that seemed too good to be true. A friend had mentioned high-protein pizza rolls in passing, and I became slightly obsessed with making them work with minimal ingredients. The first batch surprised me; they puffed up golden and warm, collapsing into pillowy softness the moment I bit through the garlic-buttered exterior. Now they're the snack I make when I want something that feels indulgent but doesn't require proving dough or waiting hours. They've become my go-to when someone stops by unexpectedly.
There was a Wednesday night when my neighbors stopped by as I was testing a batch, and the garlic-buttered aroma drew them straight to the kitchen before I'd even finished brushing them. We stood around eating warm knots straight from the pan, and I watched their skepticism melt when they realized the dough wasn't heavy or doughy—it was tender and almost cloud-like inside. That moment cemented it for me; these aren't just protein snacks, they're the kind of thing that makes people feel genuinely welcomed and cared for.
Ingredients
- Self-rising flour: This is your secret weapon—it contains salt and leavening already built in, which means the dough rises gently in the oven without any extra work from you.
- Nonfat Greek yogurt: The moisture and protein base that replaces yeast and complicated steps; use full-fat if you prefer a richer bite, though nonfat keeps things lighter.
- Salt: Just a touch to season the dough itself before the garlic butter layers on flavor.
- Pepperoni: Choose slices that aren't too thin or they'll crisp into paper; slightly thicker ones keep their texture and flavor.
- Shredded mozzarella: Avoid the pre-shredded bags if you can, as they contain anti-caking agents that sometimes make melting less smooth.
- Unsalted butter: This lets you control the salt level, especially important since the Parmesan will add its own savory bite.
- Fresh garlic: Minced fine so it distributes evenly; garlic powder works in a pinch but fresh gives a brighter edge.
- Fresh parsley: A small touch that brightens the whole thing and makes them look intentionally finished, not rushed.
- Parmesan cheese: Optional but genuinely worth it—a light sprinkle at the end adds salt, nuttiness, and a little visual polish.
Tired of Takeout? 🥡
Get 10 meals you can make faster than delivery arrives. Seriously.
One email. No spam. Unsubscribe anytime.
Instructions
- Heat your oven and prep your stage:
- Set the oven to 400°F and line a baking sheet with parchment paper so your knots don't stick or brown unevenly on the bottom.
- Make the dough:
- Combine flour, yogurt, and salt in a bowl, stirring until the mixture looks shaggy and rough, then knead gently for just 2 to 3 minutes until it smooths out. It should feel slightly tacky but not stick to your hands—if it's too wet, dust in a little more flour, one tablespoon at a time.
- Divide and shape into ropes:
- Tear the dough into 12 roughly equal pieces and roll each one between your palms into a rope about 7 inches long. Don't stress about perfect uniformity; slight variations actually look more homemade and charming.
- Flatten and fill:
- Gently press each rope into a strip about 1.5 inches wide, then lay 1 to 2 pepperoni slices and a small handful of cheese down the center. Keep the filling away from the very edges so you can seal it properly.
- Roll and seal:
- Roll each strip tightly lengthwise to encase the filling, then pinch the seam firmly so the cheese doesn't escape during baking. You'll feel when it's sealed tight.
- Tie the knot:
- Take the filled rope and tie it gently into a loose knot, tucking the ends underneath so it sits flat and doesn't unravel. Think of it like tying a soft pretzel—casual and forgiving.
- Arrange on the pan:
- Place each knot seam side down on your parchment so they don't open up, and space them about an inch apart.
- Make the garlic butter:
- Whisk together melted butter, minced garlic, fresh parsley, and a pinch of salt in a small bowl. The fresh parsley stays bright green and adds visual appeal when you brush it on.
- First butter brush:
- Brush about half the garlic butter mixture over the knots before they bake so it gets absorbed and flavors the dough itself.
- Bake until golden:
- Slide them into the oven for 16 to 18 minutes until they're a deep golden brown and firm to the touch. If you're unsure, pick one up with tongs and gently squeeze; it should feel set, not spongy.
- Finish with remaining butter:
- Pull them from the oven and immediately brush with the reserved garlic butter while they're still warm so it soaks in. This second coat is what makes them smell incredible and taste luxurious.
- Optional garnish:
- Sprinkle lightly with grated Parmesan if you want that extra savory depth, then serve warm.
 Save to Pins
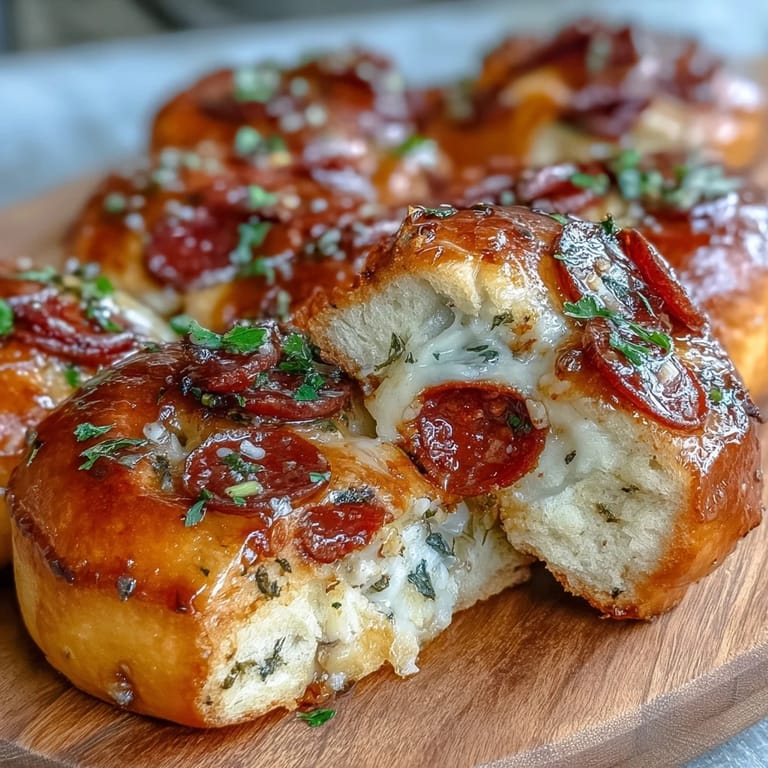
 I made these for my partner's book club last month, and they disappeared so fast I barely got to eat one myself. Watching people reach for a second knot without hesitation, still warm and glistening with that golden garlic butter, reminded me why cooking for others matters—it's a quiet way of saying you were worth the effort.
The Magic of High-Protein Dough
The first time I used Greek yogurt as a base for anything savory, I was skeptical about texture and flavor, but it turns out that tangy, creamy yogurt creates a tender crumb that's almost impossible to achieve with traditional dough. The protein content means these knots keep you satisfied longer than regular pizza rolls, and there's no guilt attached to eating several as a meal rather than a small snack. What surprised me most is how the yogurt creates a subtle tang in the background—not strong enough to notice consciously, but present enough to make the flavors feel rounded and complete.
Timing and Temperature Matter
I've made these at 375°F thinking a lower heat would keep them softer, and they came out pale and slightly tough because they baked longer and dried out. The 400°F temperature is precise on purpose; it's hot enough to puff the dough and brown the outside in the right amount of time without drying the inside. Once you nail this temperature and watch for that golden-brown cue, they come out perfect every single time.
Make It Your Own
The beauty of this recipe is how flexible it is once you understand the basic technique of rolling, filling, and tying. I've made vegetarian versions with roasted red peppers and spinach, added sun-dried tomatoes for deeper flavor, and even experimented with different cheeses like provolone or a cheddar blend. The garlic butter base is strong enough to support almost any filling you can imagine, so don't hesitate to adapt based on what you have on hand or what sounds good.
- Try adding red pepper flakes to the garlic butter if you like heat, or fresh basil for an Italian herb twist.
- These freeze beautifully unbaked; brush with garlic butter and pop them straight into the oven from frozen, adding a few extra minutes to the bake time.
- Serve with marinara sauce for dipping, or use them as a pizza-adjacent topping for salads or appetizer platters.
 Save to Pins
 These knots have quietly become my answer to the question of what to make when I want to feel like I'm showing up for people without spending my whole evening in the kitchen. There's something deeply satisfying about pulling a tray of golden, fragrant knots from the oven and watching them disappear into happy silence.
Questions & Answers
- → Can I make the dough ahead of time?
Yes, prepare the dough and store it wrapped in the refrigerator for up to 24 hours. Let it come to room temperature for about 15 minutes before rolling and filling.
- → What other fillings work well?
Try cooked Italian sausage, mushrooms, bell peppers, or spinach. For vegetarian options, skip the pepperoni and double up on cheese or add sautéed vegetables.
- → Can I freeze these before baking?
Absolutely. Arrange the filled, uncooked knots on a baking sheet and freeze until firm. Transfer to a freezer bag for up to 3 months. Bake from frozen, adding 2-3 minutes to the cooking time.
- → How do I reheat leftovers?
Reheat in a 350°F oven for 5-7 minutes until warmed through, or microwave for 20-30 seconds. The oven method helps maintain the crispy exterior.
- → Can I use regular flour instead of self-rising?
Yes. Substitute with all-purpose flour and add 1 ½ teaspoons baking powder and ¼ teaspoon salt per cup of flour used.
- → What dipping sauce pairs best?
Warm marinara sauce is classic, but try ranch, garlic aioli, or even a spicy arrabbiata sauce for extra flavor.