 Save to Pins
 Last Tuesday, my kitchen smelled like an Italian restaurant. I had breaded chicken sizzling in olive oil while my roommate peeked over my shoulder, asking if dinner was ready every three minutes. The crunch when I bit into that first cutlet made me pause mid-chew. Sometimes the simplest comfort food hits different on a random weeknight.
I made these for my cousins last summer when they dropped by unexpectedly. They stood around the stove watching the chicken turn golden, stealing pieces before I could even finish assembling the pitas. Now they text me whenever they want them again.
Ingredients
- Chicken breasts: Slice them horizontally yourself to control the thickness and get exactly four even cutlets
- Panko breadcrumbs: These Japanese breadcrumbs create a lighter airier crust than regular breadcrumbs
- Grated Parmesan: Mix it directly into the breading for salty umami in every bite
- Fresh parsley: Adds bright green color and fresh flavor to balance the rich cheese
- Dried oregano and basil: This classic Italian herb combo gives the chicken that familiar comfort food taste
- Garlic powder: Distributes evenly through the coating better than fresh garlic would
- All purpose flour: Helps the egg wash stick to the chicken for even breading
- Eggs and milk: Whisked together they create the perfect adhesive for the panko mixture
- Olive oil: Use enough to coat the bottom of your pan for even golden cooking
- Romaine lettuce: Chopped into bite sized pieces it holds up well against the warm chicken
- Caesar dressing: Creamy tangy and rich the dressing ties the whole sandwich together
- Shaved Parmesan: Thin curls of cheese melt slightly against the hot chicken
- Pita breads: Warm them up first so they are pliable and wont tear when you stuff them
Tired of Takeout? 🥡
Get 10 meals you can make faster than delivery arrives. Seriously.
One email. No spam. Unsubscribe anytime.
Instructions
- Prep the chicken cutlets:
- Place each chicken breast flat on your cutting board. Use a sharp knife to slice horizontally through the center creating two thinner pieces from each breast. Pound them lightly if they are uneven in thickness.
- Set up your breading station:
- Arrange three shallow bowls in a row. Put flour in the first one. Whisk eggs and milk together in the second. Mix panko grated Parmesan parsley oregano basil garlic powder salt and pepper in the third bowl.
- Bread each cutlet:
- Dredge chicken through flour shaking off excess. Dip into egg mixture letting extra drip off. Press firmly into panko mixture coating both sides well. Place on a clean plate while you finish the rest.
- Cook the chicken:
- Heat olive oil in a large skillet over medium heat. Add breaded cutlets without crowding the pan. Cook 3 to 4 minutes per side until deep golden brown and chicken reaches 165°F internally. Transfer to paper towels to drain.
- Warm the pitas:
- Toss them in a dry skillet for 1 to 2 minutes or wrap in foil and place in a 350°F oven. You want them soft and flexible not crispy or dry.
- Make the Caesar salad:
- Combine chopped romaine Caesar dressing and shaved Parmesan in a large bowl. Toss until every leaf is evenly coated. Add cherry tomatoes now if you are using them.
- Slice the chicken:
- Cut each cooked cutlet into strips about half an inch wide. Keep them warm if possible or let them sit for a few minutes to rest.
- Assemble the pitas:
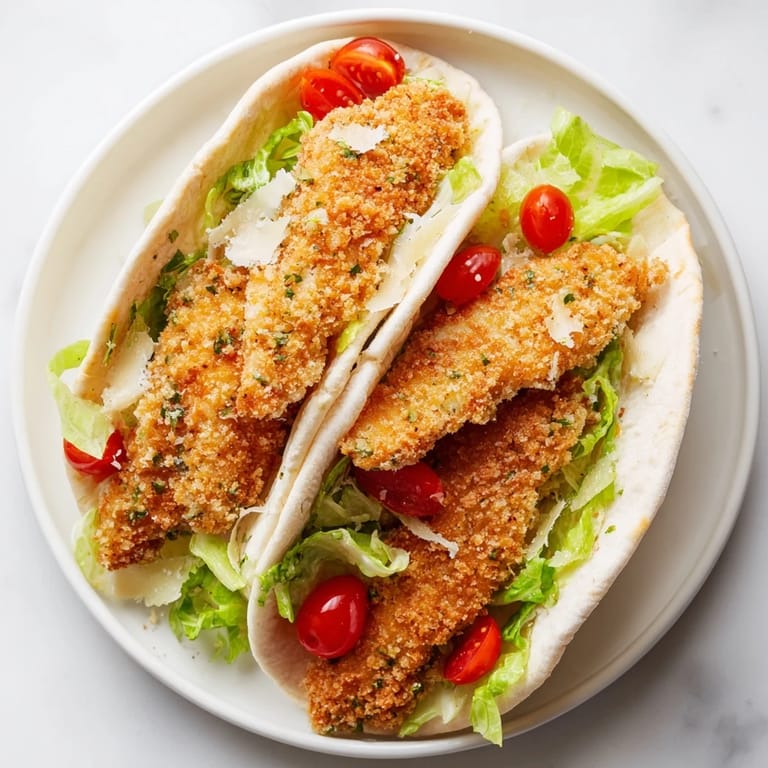
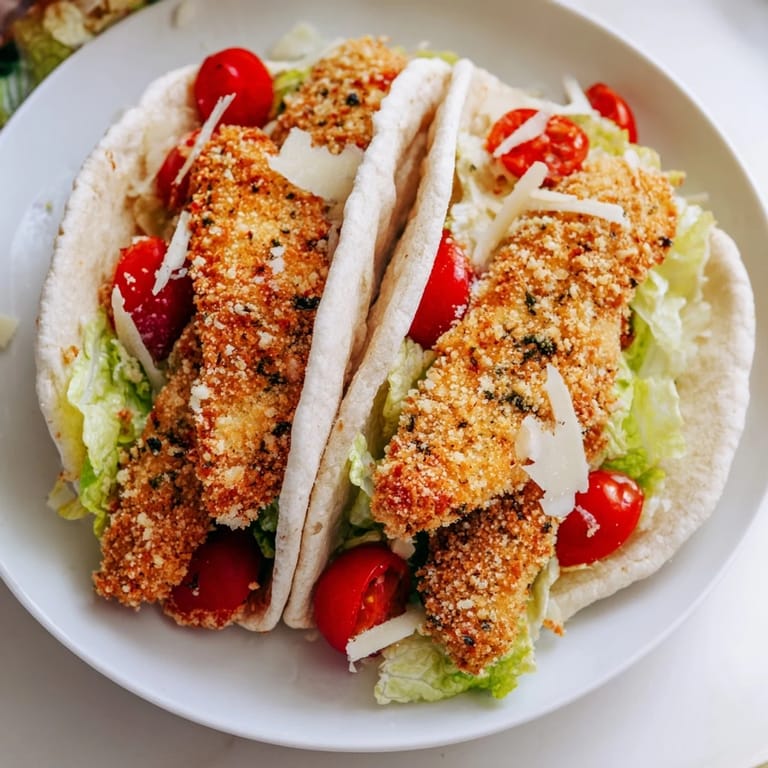
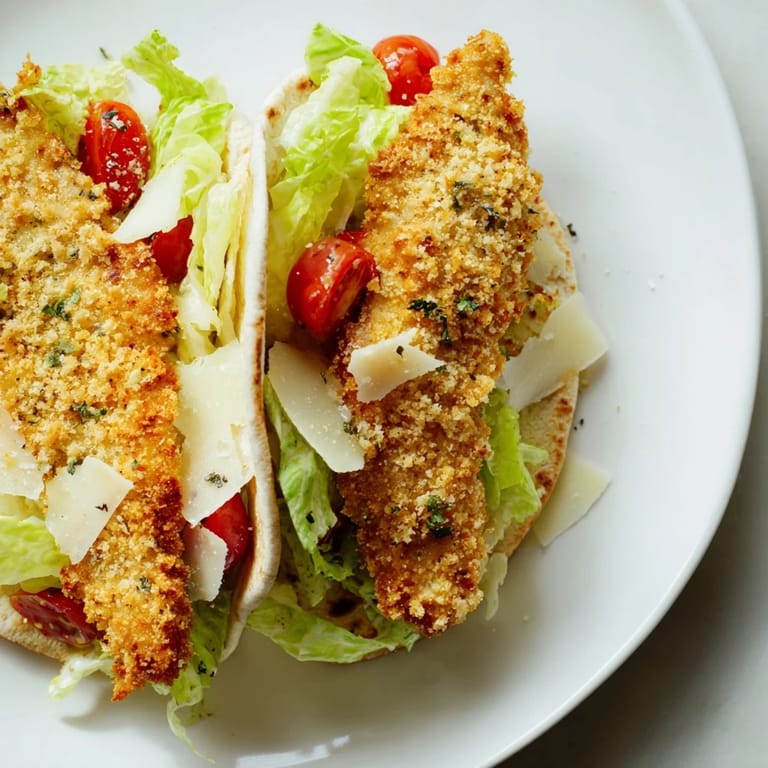
- Cut each warm pita in half. Gently open the pocket and stuff with Caesar salad. Top with chicken strips letting some hang out for that beautiful presentation.
 Save to Pins
 My dad tried these last month and announced they were better than any restaurant Caesar wrap he has ever had. He asked me to write down the recipe which is basically his highest compliment.
Making It Ahead
You can bread the chicken cutlets up to four hours ahead and store them layered between parchment paper in the fridge. The salad needs to be tossed right before serving or the lettuce will get wilted and sad. I have also cooked and sliced the chicken in advance then reheated it in a 375°F oven for about 10 minutes to recrisp the crust.
Getting The Crisp Right
Pat your chicken completely dry with paper towels before starting the breading process. Any moisture on the surface will make the flour clump up unevenly. Press the panko mixture firmly onto each cutlet and do not shake off excess crumbs. The more coating you can get to stick the better your final crunch will be.
Customizing Your Pitas
Sliced avocado adds creamy richness that balances the salty chicken perfectly. Crispy bacon takes everything over the top though that is definitely not traditional Caesar territory. I have made these with grilled chicken when I wanted something lighter and the combination still works beautifully.
- Try whole wheat pitas for extra fiber and a nuttier flavor
- Add thinly sliced red onion for sharp crunch and color contrast
- Drizzle extra Caesar dressing inside the pita before filling for maximum flavor
 Save to Pins
 Something magical happens when hot crispy meets cold and creamy in these pitas. They have become my go to for feeding a crowd without spending hours in the kitchen.
Questions & Answers
- → How do I keep the chicken cutlets crispy?
Pound the chicken breasts to even thickness before breading, use a fresh egg wash, and press the panko mixture firmly onto each cutlet. Cook in medium heat with enough olive oil to create a golden crust without burning the coating. Rest on paper towels immediately after cooking to remove excess oil.
- → Can I prepare the chicken ahead of time?
Yes, you can bread the chicken cutlets up to 4 hours in advance and refrigerate them on a parchment-lined tray. Cook them just before serving to maintain crispness. Alternatively, cook the chicken and store in an airtight container for up to 3 days, then reheat gently in a 350°F oven.
- → What's the best way to warm pita bread?
Heat pita in a dry skillet over medium heat for 1-2 minutes until soft and flexible, or wrap in foil and warm in a 350°F oven for 5-7 minutes. This keeps them pliable for easy pocketing without drying them out.
- → Can I grill the chicken instead of pan-frying?
Absolutely. Grill boneless, skinless chicken breasts over medium-high heat for 6-7 minutes per side until cooked through. You can still bread them for flavor, or simply season and grill plain for a lighter version with fewer calories.
- → Are there allergen-free modifications?
For gluten-free: use gluten-free panko and verify your Caesar dressing is certified gluten-free. For dairy-free: omit Parmesan and use dairy-free Caesar dressing. For egg-free: substitute with aquafaba or plant-based egg wash. Always check Caesar dressing labels for fish or soy content.
- → What sides pair well with this dish?
Serve with Greek yogurt dip, roasted vegetables, sweet potato fries, or a fresh green salad. Lemon wedges brighten the flavors. For a lighter meal, pair with steamed broccoli or a side of cucumber and tomato salad.